• Skip to main content
  • Skip to footer

InRhythm

Your partners in accelerated digital transformation

  • Who We Are
  • Our Work
  • Practices & Products
  • Learning & Growth
  • Culture & Careers
  • Blog
  • Contact Us

Mobile Development

May 30 2023

How To Build Full Stack Applications In AWS Amplify

Based on a Lightning Talk by: Nikolai Tarasov, Senior iOS Engineer @ InRhythm on May 18th, 2023

Overview

AWS Amplify is a comprehensive development platform offered by Amazon Web Services (AWS) that simplifies the process of building web and mobile applications. It provides developers with a set of tools, services, and libraries that streamline the development workflow and enable rapid iteration.

In Nikolai Tarasov’s Lightning Talk session, we will explore the key features of AWS Amplify and discuss its advantages in building modern applications:

  • Overview
  • What Is AWS Amplify?
  • Key Features Of AWS Amplify 
  • Advantages Of AWS Amplify
  • Closing Thoughts

What Is AWS Amplify?

AWS Amplify is an open-source framework that enables developers to build scalable and secure applications with ease. It abstracts away the complexities of backend infrastructure setup, allowing developers to focus on building features and delivering value to end-users. Amplify supports popular frontend frameworks such as React, Angular, and Vue.js, making it accessible to a wide range of developers.

Key Features Of AWS Amplify

  • Authentication And Authorization

Amplify provides a simple and secure way to add user authentication and authorization to your applications. It integrates with popular identity providers like Amazon Cognito, allowing you to easily handle user sign-up, sign-in, and password recovery flows. Amplify also provides fine-grained access control and role-based permissions, ensuring that only authorized users can access specific resources within your application.

  • Data Storage And APIs

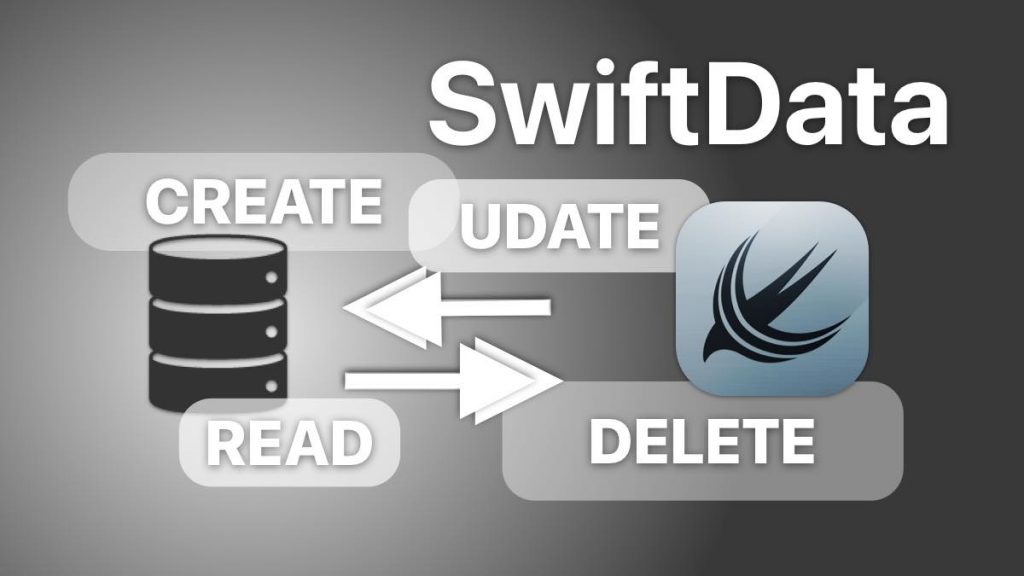
With Amplify, you can easily integrate your application with various data storage options such as Amazon DynamoDB, Amazon Aurora, or Amazon S3. Amplify’s DataStore API simplifies data synchronization between your frontend and backend, providing real-time updates and offline capabilities. It also supports GraphQL and REST APIs, making it flexible to work with different data models and query patterns.

  • Serverless Functions

AWS Amplify enables you to write serverless functions using AWS Lambda. These functions can be triggered by events and integrated seamlessly into your application’s backend. Amplify also provides built-in support for common use cases such as file uploads, image transformations, and sending notifications. With serverless functions, you can extend your application’s functionality without managing traditional server infrastructure.

  • Hosting And Deployment

Amplify simplifies the process of hosting and deploying your applications. It provides a managed hosting service that automatically provisions and configures the necessary infrastructure to serve your frontend assets. Amplify seamlessly integrates with popular Git-based workflows, allowing you to deploy your application with a simple push to your preferred Git repository.

Advantages Of AWS Amplify

  • Rapid Development And Iteration

AWS Amplify accelerates the development process by abstracting away the complexities of backend infrastructure and providing a streamlined workflow. It enables developers to focus on building features and delivering value to end-users without getting caught up in infrastructure management. The ease of integration with popular frontend frameworks further speeds up development time.

  • Scalability And Security

By leveraging AWS services such as Amazon Cognito, AWS Lambda, and DynamoDB, Amplify provides a scalable and secure foundation for your applications. AWS’s robust infrastructure ensures that your application can handle increased traffic and demand. Amplify’s built-in security features, such as user authentication and fine-grained access control, help protect your application and data.

Closing Thoughts

AWS Amplify simplifies the process of building web and mobile applications by abstracting away the complexities of backend infrastructure. It offers a comprehensive set of features, including authentication, data storage, serverless functions, and hosting, that enable developers to build scalable and secure applications with ease. By leveraging AWS services and integrating seamlessly with popular frontend frameworks, Amplify provides a streamlined development workflow and facilitates rapid iteration.

Written by Kaela Coppinger · Categorized: Code Lounge, Learning and Development, Product Development · Tagged: Application Development, AWS, best practices, Full Stack Apps, iOS Engineering, learning and growth, Mobile Development

May 08 2023

InRhythm Presents The Propel Spring Quarterly Summit

Design Credit: Joel Colletti, Lead UI/UX Designer @ InRhythm

New York, NY – InRhythm recently concluded its very first Propel Spring Quarterly Summit; a premiere event consisting of six individual coding workshops aimed to support the learning and growth of engineering teams around the world. 

Over the last three weeks, our consulting practices have led a series of interactive experiences that delved into the latest technology trends and tools, designed to propel professionals forward into their careers. 

The workshops are free to access as a unique part of InRhythm’s mission to build a forward-thinking thought leadership annex:

  • InRhythm Propel Spring Quarterly Summit / SDET Workshop / March 17th 2023
  • InRhythm Propel Spring Quarterly Summit / Web Workshop / March 24th 2023
  • InRhythm Propel Spring Quarterly Summit / DevOps Workshop / March 29th 2023
  • InRhythm Propel Spring Quarterly Summit / Android Workshop / April 11th 2023
  • InRhythm Propel Spring Quarterly Summit / Cloud Native Workshop / April 21st 2023
Design Credit: Joel Colletti, Lead UI/UX Designer @ InRhythm

SDET Workshop (03/17/23)

Design Credit: Joel Colletti, Lead UI/UX Designer @ InRhythm

This workshop worked as an introduction to writing and running tests using Microsoft Playwright. Our SDET Practice went over Playwright’s extensive feature set before diving more in-depth with its API.  

For the workshop, the team went over setup and installation of the tool, as well as wrote a series of comprehensive tests against a test application. Once tests were run, the team afforded participants the opportunity to go over some of Playwright’s advanced features, such as its powerful debugger and enhanced reporting. 

To close out the workshop, SDET Practice Leadership compared Playwright’s features to some of its competitors, went over its pros and cons, and discussed why they believed it to be a paramount tool to consider for automated testing solutions.

Web Workshop (03/24/23)

Design Credit: Joel Colletti, Lead UI/UX Designer @ InRhythm

Our Web Practice focused their workshop on their top three, intertwining technologies for development cycles. 

With many modern web applications sharing many of the responsibilities that a middle layer/presentation and service layer/backend provide to the frontend layer, the project was kicked off by organizing the elements with a mono-repository.  

Once the application moved into its build phase, it was time to accelerate the architecture to the next level using NextJS. 

Web Practice Leadership wrapped their project, with an intuitive overview of web bundling and the variety of methods utilized – in order to best adapt to each individual build.

DevOps Workshop (03/29/23)

Design Credit: Joel Colletti, Lead UI/UX Designer @ InRhythm

In this workshop, the DevOps Practice demonstrated tools for provisioning infrastructure as well as how to construct a self-servicing platform for provisioning resources. With these new developments in the industry, bridging the gaps between development and ops by allowing developers to self-manage cloud infrastructure to satisfy their needs will be a paramount skill to adopt. Our DevOps practitioners discussed the pros and cons of a number of tools for provisioning infrastructure and identified which tools can best fit a business’ needs.

For the hands-on interactive session, the team ran through the necessary steps to get started with Pulumi and provision a resource onto AWS, along with demonstrating Terraform in order to get a feel for the difference between the two popular infrastructure-as-code tools. After that, we set up some plugins to enhance the development experience with IaC.  

Self-servicing platforms are the best way to allow for engineers to provision resources and infrastructure for their needs en-masse. With Backstage, the team was able to demonstrate a platform for engineers to come to and fulfill their needs whether it be creating a new microservice, a new repository, or even provisioning a new k8s cluster. Furthermore, the provisioning of these resources were proven to standardize and bring uniformity to ensure that best practices are enforced. Long gone are the days of submitting a ticket to create a new instance to deploy an application, with a wait time of a few hours or even a few days.  Self-servicing tools are the future of bringing operations into the hands of developers and bridging the gap between development and operations.

Finally, DevOps Practice Leadership set up a self-servicing platform and hooked it into the aforementioned IaC repository to allow for the provisioning of resources from a GUI. 

Managing infrastructure can quickly become tedious as the number of resources being used on a cloud provider continue to grow.  With infrastructure-as-code, not only DevOps engineers, but developers can now lay out infrastructure using code. Since it’s managed via code, version-controlling/source-code management tools are also available, making management of infrastructure significantly easier.

iOS Workshop (03/28/23)

Design Credit: Joel Colletti, Lead UI/UX Designer @ InRhythm

Our iOS Practice did a full overview of Swift Async/Await for iOS application development

Async/Await is a programming feature that simplifies asynchronous operations by allowing software engineers to write asynchronous code in a synchronous manner. It also makes code easy to read/write, improves performance/responsiveness, and reduces the likelihood of errors.

In short, Async/Await is a powerful modern feature in every avenue from development speed and simplified code to and application performance.

Android Workshop (04/11/23)

Design Credit: Joel Colletti, Lead UI/UX Designer @ InRhythm

Our Android Practice performed a comprehensive demonstration of the practical integration of Kotlin Multi-Platform Mobile (KMM) for cross-platform development. 

Kotlin Multi-Platform Mobile is an exciting, growing new technology that allows sharing core code between Android, iOS, and Web.  

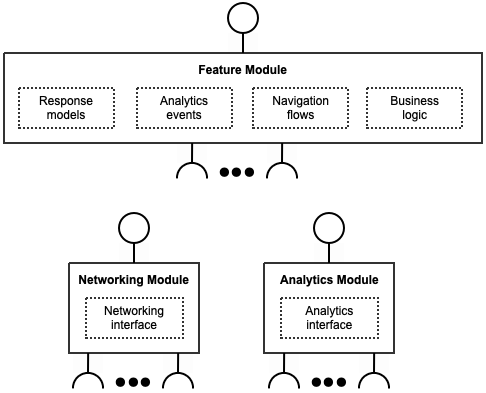
In this workshop, Android Practice Leadership explored what KMM was, how to setup a project for KMM, a walkthrough implementing a core module to a few APIs (network layer, data models, parsers, and business logic), and then consumed this core library in an Android (Jetpack Compose) and iOS (SwiftUI) application.

Cloud Native Application Development Workshop (04/21/23)

Design Credit: Joel Colletti, Lead UI/UX Designer @ InRhythm

In this workshop our Cloud Native Application Development Practice introduced the participants to gRPC, which is Google’s take on Remote Procedural Calls. Our Practice Leadership presented a brief history of gRPC and Protocol Buffers. Google and other companies use gRPC to serialize data to binary which results in smaller data packets. Throughout the presentation our team went over some of the pros and cons of using gRPC for individual API calls.

In our hands-on workshop portion participants created a simple application to manage users and notes powered by Java, gRPC, and Postgres. The grand finale featured a full-circle moment as we worked together to create a series of CRUD APIs in Java using gRPC to send/receive data packets, translate those into objects, and store them in a database.

About InRhythm

InRhythm is a leading modern product consultancy and digital innovation firm with a mission to make a dent in the digital economy. Founded in 2002, InRhythm is currently engaged by Fortune 50 enterprises and scale-ups to bring their next generation of modern digital products and platforms to market. InRhythm has helped hundreds of teams launch mission-critical products that have created a positive impact worth billions of dollars. The projects we work on literally change the world.

InRhythm’s unique capabilities of Product Innovation and Platform Modernization services are the most sought-after. The InRhythm team of A+ thought leaders don’t just “get a job,” they join the company to do what they love. InRhythm has a “who’s who” clients list and has barely scratched the surface in terms of providing those clients the digital solutions they need to compete. From greenfield to tier-one builds, our clients look to us to deliver their mission-critical projects in the fields of product strategy, design, cloud native applications, as well as mobile and web development. 

Written by Kaela Coppinger · Categorized: Culture, DevOps, Employee Engagement, Events, InRhythm News, InRhythmU, Java Engineering, Learning and Development, Product Development, Software Engineering, Web Engineering · Tagged: Android, best practices, Cloud Native Application Development, devops, INRHYTHMU, ios, JavaScript, learning and growth, Mobile Development, Press Release 2023, Propel, Propel Workshop, SDET, software engineering, Spring Quarterly Propel Summit, Web

Apr 12 2023

Structured Concurrency In Swift

Based on a Lightning Talk by: Joshua Buchanan, Lead iOS Engineer @ InRhythm on March 28th, 2023 as part of the Propel Spring Quarterly Summit 2023

Author: Mike Adams, Senior Technical Writer @ InRhythm

Swift Concurrency

Design Credit: Joel Colletti, Lead UI/UX Designer @ InRhythm

Concurrency is a task-based system that allows developers to take full advantage of the “await” portion of the Async/Await keywords to perform concurrent task execution. An Async/Await task waits until its process finishes before continuing.

Async/Await lets you take advantage of parallelization to make full use of all the available CPU cores to give your users the best user experience. 

Swift Concurrency includes, Async/Await, Tasks, and Task Groups. As you read “Async/Await,” assume that it means the entirety of Swift Concurrency and not simply, Async/Await.

Here are the keywords and concepts we’ll use in discussing Structured Concurrency:

  • Task – That portion of the concurrency framework that creates the concurrent environment. It can throw errors and return values
  • Child Task – A task generated and managed by a Parent Task.The Parent is responsible for task execution
  • Cancellation – In Swift, you can cancel or stop any task from completing. Unlike Combine, structured concurrency does not require a strong reference to emit values from the publisher (i.e., the Task) and continue to run even if you remove references to the publisher. If you don’t want the task to run, you must either cancel or stop it
  • Priorities – Structured Concurrency’s Task Priorities are very similar to Apple’s Quality of Service system. Task Priorities include:
    • High
    • Background
    • Low
    • Medium
    • userInitiated
    • Utility

When using Structured Concurrency in your code, remember that while priority setting in your code tells the system which tasks are most important, those priorities are only a suggestion, not a mandate. 

Async/Await

Async/Await provides the Structured Concurrency that removes the necessity of manually propagating errors and managing cancellation, as well as any other types of concurrency issues (e.g., race conditions). It makes program logic simpler to follow as the methods execute linearly rather than with the back and forth required when using completion handlers. 

Structured concurrency also improves performance and allows for cleaner, more readable code with more precise error handling. In structured concurrency, long-running tasks are self-managing in regard to resources, error propagation, or any concurrency issues. 

Async/Await was first popularized in 2012 via the C# programming language. Between 2012 and 2020, other languages began adopting Async/Await, including but not limited to:

  • Python / Typescript in 2015
  • Kotlin in 2018
  • Rust in 2019
  • C++ in 2020
  • Swift in 2021

Tasks

Although Tasks appear very basic, behind the scenes there is a great deal happening. 

The Task keyword tells the compiler that the code inside the brackets must run in its own area using different rules than the rest of the application. This is the beginning of writing concurrent code in Swift.

In Swift, Tasks check if they were cancelled at appropriate times during execution. If cancelled, the Task begins whatever processing is necessary to cease execution and then responds to the cancellation. Depending on the code, the response could be returning partially finished work, returning an empty collection (or nil), or throwing a cancellation error.

Task Example

The load function shown below displays all the parts of a concurrent function coded as a task.

Child Tasks

Child Tasks are bound to a Parent Task and inherit the Parent Task’s Priority. Parent Tasks can have multiple Child Tasks and a Child Task can be a Parent Task to other Child Tasks.

While Parent Tasks can cancel a Child Task, a Child Task can not cancel their Parent task. Child Tasks begin whatever process is necessary for them to halt once their Parent Task is cancelled. All Child Tasks must finish before the Parent Task can be completed.

Cancellations

Unlike Combine, Tasks in Structure Concurrency will continue to run even when there are no Subscribers. Tasks run until they are completed or until you cancel them in code or programmatically. Cancellations are not determined by strong reference.

Tasks “know” whether they’ve been canceled and you can explicitly cancel a Task. You can also use the Task.checkCancellation() call to check if a Task was cancelled.

There are a number ways to programmatically cancel a Task including:

  • Navigating away from a view where the task was triggered
  • Canceling that Task’s Parent Task to cancel all of its Child Tasks
  • When another Child Task of the same Parent throws an Error

Async Let

Async Let is a variation of Async/Await that differs from the Await version, in that it will immediately launch a known number of Tasks in parallel and manage them in a slightly different manner than Async/Await. Where an Async/Await call suspends the Parent Task during Child Task execution, the Async Let call allows the Parent Task to continue running normally. 

You would use Async Let when you’re certain that the Async code can run independently. Note that unlike a regular Async/Await Call, you cannot directly cancel Async Let calls.

A further difference is that you can only use Async Let in local declarations, not at the top level.

Use Async Let when you need the results from the call later in your application, not immediately. For example, you could use multiple Async Let calls to load gallery images without blocking the main thread, thereby allowing the user to continue using the application’s GUI while the images load. 

Use Async Let when:

  • You have enough detail to request the information you need prior to making the call 
  • The calls do not depend on another call’s results 
  • You are returning different kinds of data
  • The order in which the app returns results is unimportant

Task Groups

Task Groups allow you to combine an unknown number of parallel Child Task calls that return the same Type of data into a batch, and then wait until the last Child Task finishes before completing the call. This is most useful when the results are a consistent type, such as when combining API responses into a single object. Task Groups only complete after all Child Tasks in the Task Group are complete.

It is important to never mutate the Task Group using code from outside the Task where the Task Group was created. Doing so interleaves data obtained by the Task Group with the data from outside the Task Group which leaves the results inconsistent. 

Using Try Await allows you to handle any potential thrown errors in the grouped call using additional code.

For example, let’s say you have a function that returns a string value and you need to call the function n times. Each time that function returns, you want to append the resultant string to an array of strings:  

Once all the Tasks in the Task Group are complete, you want the Task Group to return a String array. The “of” type for the Task Group is String because the result of the parallel task is a String and the returning type is an array of Strings

Coding UIImages in Task Groups will appear more familiar. For example, let’s say that you have a list of indeterminate size composed of URLs that point to specific images, and a function that downloads an image from each of those URLs and then adds it to an image array returned from the Task Group.

In this case, the “of” type for your Task Group is UIImage, and because the parallel function inside the task is downloading UIImage data, and the returning type for the Task Group is an array of UIImages.

Task Group Example

The Of type for this example Task Group scenario is UIImage and because the parallel function inside the task is downloading UIImage data, the “returning” type of the task group is an array of UIImages.

There are two things happening in this example code. The first is the execution of the parallel downloading task for the individual images located at each URL. The second takes the results from the previous task (the UIIMage) and combines them into a single array of images.

Resources

  • Apple Developer: Getting Started with Swift Concurrency
  • InRhythm Swift Lightning Talk (Deck): Structured Concurrency in Swift
  • Linkedin Video: InRhythm Propel Workshop (Video) 
  • GitHub Repo: Async Await Propel Workshop GitHub Repo 
  • Blog, Antoine van der Lee: Async await in Swift explained with code examples

Written by Mike Adams · Categorized: Code Lounge, InRhythmU, Learning and Development, Product Development, Software Engineering · Tagged: Async Await, best practices, INRHYTHMU, ios, iOS Workshop, learning and growth, Mobile App Development, Mobile Development, Mobile Engineering, Propel Spring Quarterly Summit 2023, software engineering, SwiftUI, ux

Mar 16 2023

An Introduction To Cross-Platform Mobile Development

Author: Minhazur Rahman, Senior Android Developer @ InRhythm

Overview

No alt text provided for this image

As mobile technology continues to evolve, we as developers are faced with the challenge of creating mobile apps that work great on all platforms. Traditionally, this has meant building separate apps for each platform, which is very time consuming and costly. However, with the rise of cross-platform mobile development, developers can now write code once and deploy it across multiple platforms.

We will explore:

  • The pros and con of cross-platform mobile development
  • How it compares to native development
  • Some of the most common tools and frameworks used in cross platform development

What Is Cross-Platform Mobile Development?

No alt text provided for this image

Cross-platform mobile development refers to the process of writing code once and deploying it across multiple platforms, such as iOS and Android. This is achieved using frameworks and tools that allow developers to write code in a single codebase and then compile it for multiple platforms.

Cross-platform development offers several advantages over native development, including:

  • Cost Savings: With cross-platform development, developers can write code once and deploy it across multiple platforms, reducing the time and cost required to develop separate app for each platform
  • Wider Audience: By deploying an app on multiple platforms, developers can reach a wider audience, increasing the app’s potential user base
  • Consistent User Experience: Cross-platform development allows developers to ensure that users have a consistent experience across multiple platforms, improving the overall user experience
No alt text provided for this image

However, cross-platform development also has some limitations, including:

  • Performance Issues: Cross-platform apps may not perform as well as native apps, particularly for complex apps that require heavy processing or graphics
  • Limited Access To Native Features: Cross-platform development may not provide access to all of the native features of each platform, limiting the app’s functionality
  • Development Limitations: Cross-platform development may limit the development process, as developers may need to compromise on certain features or design elements to ensure compatibility across multiple platforms

Cross-Platform Development vs. Native Development

No alt text provided for this image

To better understand the pros and cons of cross-platform development, it’s important to compare it to native development. Native development involves building separate apps for each platform using that platform’s specific language and tools.

Native development offers several advantages, including:

  • Access To Native Features: Native development provides access to all of the native features of each platform, allowing developers to create apps with rich functionality and design
  • Better Performance: Native apps generally perform better than cross-platform apps, particularly for complex apps that require heavy processing or graphics
  • Better User Experience: Native apps can provide a better user experience, as they are designed specifically for each platform, taking into account the unique features and design elements of each platform
No alt text provided for this image

Native development has limitations as well:

  • Time And Cost: Developing separate apps for each platform can be time-consuming and costly, as developers need to learn multiple programming languages and use platform-specific tools
  • Limited Audience: Developing separate apps for each platform may limit the app’s audience, as users may only be able to access the app on one platform
  • Inconsistent User Experience: Developing separate apps for each platform may result in inconsistent user experience, as users may have different experiences depending on the platform they are using

Common Tools and Frameworks For Cross-Platform Development

To make cross-platform development easier, there are several tools and frameworks available that allow developers to write code once and deploy it across multiple platforms. Here are some of the most common ones:

No alt text provided for this image
  • React Native: React Native is a popular framework for building cross-platform apps using JavaScript and React; a popular JavaScript library for building user interfaces. It allows developer to write code once and deploy it on both iOS and Android
No alt text provided for this image
  • Xamarin: Xamarin is a cross-platform development tool that uses C# to build apps for iOS, Android, and Windows. It allows developers to share code between platforms, reducing development time and cost
No alt text provided for this image
  • Flutter: Flutter is a popular framework for building cross-platform apps using Dart: a programming language developed by Google. It allows developers to create beautiful and fast apps that work seamlessly across multiple platforms
No alt text provided for this image
  • Ionic: Ionic is a popular open-source framework for building cross-platform mobile apps using web technologies such as HTML, CSS, and JavaScript. It allows developers to create hybrid apps that work on both iOS and Android

When To Choose Cross-Platform Over Native Development

No alt text provided for this image

Choosing between cross-platform and native development depends on several factors, including the app’s complexity, budget, and timeline.

Here are some scenarios where cross-platform development may be the better option:

  • Limited Budget: If you have a limited budget, cross-platform development can be a cost-effective solution as it allows you to write code once and deploy it on multiple platforms
  • Tight Timeline: If you need to develop an app quickly, cross-platform development can help you save time as you don’t need to write separate code for each platform
  • Simple Apps: If your app is simple and doesn’t require access to many native features, cross-platform development can be a good option
  • Maintenance: If you need to maintain your app on multiple platforms, cross-platform development can be a more efficient solution as you can make changes to the codebase once and deploy it across all platforms
No alt text provided for this image

However, there are also scenarios where native development may be the better option, such as:

  • Complex Apps: If your app requires access to many native features or requires heavy processing or graphics, native development may be the better option as it can provide better performance
  • Design: If your app requires a unique design that is specific to each platform, native development may be the better option as it allows you to design the app specifically for each platform
  • Budget: If you have a larger budget, native development may be a better option as it can provide a better user experience and access to all of the native features of each platform

Conclusion

No alt text provided for this image

Cross-platform mobile development is a popular solution for creating apps that work seamlessly across multiple platforms. While it offers several advantages, such as cost savings and a wider audience, it also has limitations, such as performance issues and limited access to native feature.

Choosing between cross-platform and native development depends on several factors, including the app’s complexity, budget, and timeline. By weighing the pros and cons, developers can choose the best solution for their app development needs.

Written by Kaela Coppinger · Categorized: Code Lounge, InRhythmU, Learning and Development, Product Development · Tagged: Android, best practices, Cross Platform Development, INRHYTHMU, JavaScript, learning and growth, Mobile App Development, Mobile Apps, Mobile Development

Nov 01 2022

An Introduction To SwiftUI Animations

Overview

Since the very beginning of iOS, animations have been a key part of the user experience. Animation is a brilliant way to wow users, and make an app look and feel unique. Practically speaking, animation can grab a user’s attention, and allow them to focus on what’s most important. It can help users intuitively understand how to navigate an app or alert them to important changes.

SwiftUI takes care of all the complexity in making effects by automatically animating any transitions that may happen. Done are the days of writing complicated code for a singular animated transition – the framework comes with enough built-in effects that can perform different animations.

In Joshua Buchanan’s Lightning Talk session, we will breaking down the following topics:

  • Overview
  • Why Have Animations?
  • SwiftUI Animation Options
  • How To Add Animations With SwiftUI
  • Live Demonstration
  • Closing Thoughts

Why Have Animations?

Animations are an easy way to show users the functionality hidden behind a beautiful wrapper.

Animations are quite an important part of any application because it draws users’ attention. An animation is simply a collection of images that are repeated at high speed, but animations can set your application apart.

Mobile app animations occupy an important place in the design of the whole user experience of an app. They are great for communicating a message and creating a feeling by not limiting the method with static images or texts. The dynamism that in-app animations inherently have makes the user journey more vivid and delightful. Thanks to that, an animated app can achieve higher user engagement rates.

SwiftUI Animation Options

Animations on SwiftUI have a variety of options built into its starting interface. These options allow for a number of different transitions to take place swiftly and automatically. 

There are a number of varying involvement regarding these options, from basic to advanced – each piece brings a unique visual perspective to life.

The primary basic animation options available to a mobile developer utilizing SwiftUI for their mobile application are:

  • Enable
  • Offset
  • Color
  • Scale

The most popular of these advanced options being:

Repeat Count / Reverse

Duration Options (Speed)

Curve Options

How To Add Animations With SwiftUI

SwiftUI has built-in support for animations with its animation() modifier. To use this modifier, place it after any other modifiers for your views, tell it what kind of animation you want, and also make sure you attach it to a particular value so the animation triggers only when that specific value changes.

SwiftUI animates the effects that many built-in view modifiers produce, like those that set a scale or opacity value. You can animate other values by making your custom views conform to the Animatable protocol, and telling SwiftUI about the value you want to animate.

When an animated state change results in adding or removing a view to or from the view hierarchy, you can tell SwiftUI how to transition the view into or out of place using built-in transitions that AnyTransition defines, like slide or scale. You can also create custom transitions.

Live Demonstration

Joshua Buchanan has crafted an intuitive test to demonstrate real time code and their animated results via SwiftUI:

Be sure to follow Joshua’s entire Lightning Talk to follow along with these steps in real time.

Closing Thoughts

In SwiftUI, Animation is nothing but the change of the state from start to finish with different curves and velocities. The syntax is mostly easy to understand and quick to implement. Animating is quite easy with the use of different implicit animation like easeIn, easeOut, linear, spring, and interpolating spring. A developer can create awesome animations with just a few lines of code in SwiftUI.

Happy coding!

To learn more about the implementation of SwiftUI Animations and to experience Joshua Buchanan’s full Lightning Talk session, watch here. 

Written by Kaela Coppinger · Categorized: Code Lounge, Design UX/UI, DevOps, Learning and Development, Product Development · Tagged: coding, INRHYTHMU, Mobile Development, software development, SwiftUI, ux

  • Go to page 1
  • Go to page 2
  • Go to Next Page »

Footer

Interested in learning more?
Connect with Us
InRhythm

110 William St
Suite 2601
New York, NY 10038

1 800 683 7813
get@inrhythm.com

Copyright © 2023 · InRhythm on Genesis Framework · WordPress · Log in

This website uses cookies to improve your experience. We'll assume you're ok with this, but you can opt-out if you wish. Cookie settingsACCEPT
Privacy & Cookies Policy

Privacy Overview

This website uses cookies to improve your experience while you navigate through the website. Out of these cookies, the cookies that are categorized as necessary are stored on your browser as they are essential for the working of basic functionalities of the website. We also use third-party cookies that help us analyze and understand how you use this website. These cookies will be stored in your browser only with your consent. You also have the option to opt-out of these cookies. But opting out of some of these cookies may have an effect on your browsing experience.
Necessary
Always Enabled
Necessary cookies are absolutely essential for the website to function properly. This category only includes cookies that ensures basic functionalities and security features of the website. These cookies do not store any personal information.
Non-necessary
Any cookies that may not be particularly necessary for the website to function and is used specifically to collect user personal data via analytics, ads, other embedded contents are termed as non-necessary cookies. It is mandatory to procure user consent prior to running these cookies on your website.
SAVE & ACCEPT