Based on a Lightning Talk by: Bhavan Kuchibhotla, Lead Web Engineer @ InRhythm on August 17th, 2023

Overview
In the ever-evolving realm of web development, performance remains a cornerstone of user satisfaction. With the release of Next.js 13, developers have been gifted a toolbox of performance enhancements and best practices that promises to elevate user experiences to unprecedented heights.
In Bhavan Kuchibhotla’s Lightning Talk session, we will delve into the heart of Next.js 13, exploring its revolutionary performance improvements and the best practices that can amplify your web applications’ speed and responsiveness.
The Need For Lightning Fast Performance

In a digital landscape where seconds can make or break user engagement, performance optimization stands as a non-negotiable factor. Next.js 13 shines as a beacon of innovation, placing speed and responsiveness at the forefront.
Automatic Prefetching: Navigating At The Speed Of Thought
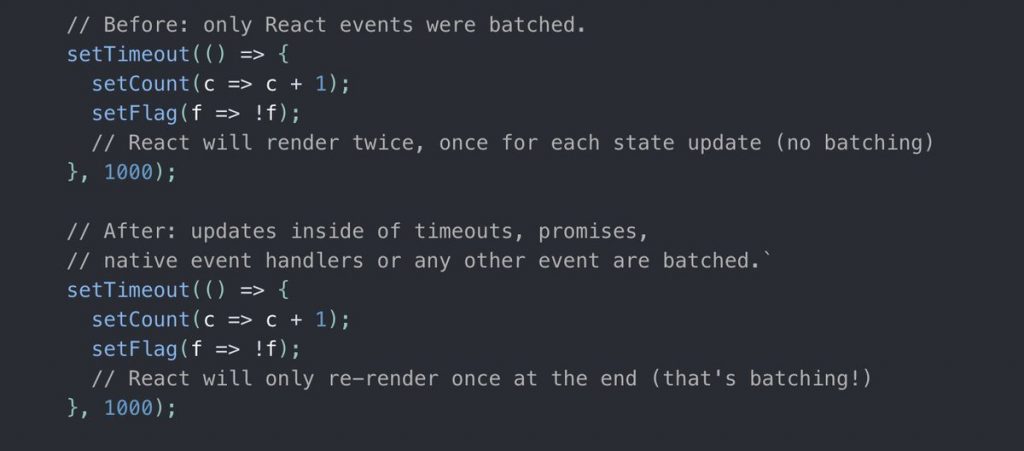
Concurrent rendering is a performance game-changer introduced in Next.js 13. By allowing multiple tasks to be executed concurrently, even during resource-intensive computations, the framework ensures that user interactions remain fluid and the interface responsive. This is an essential leap forward for applications that require real-time updates and complex calculations.
Code Splitting: Loading Only What’s Needed
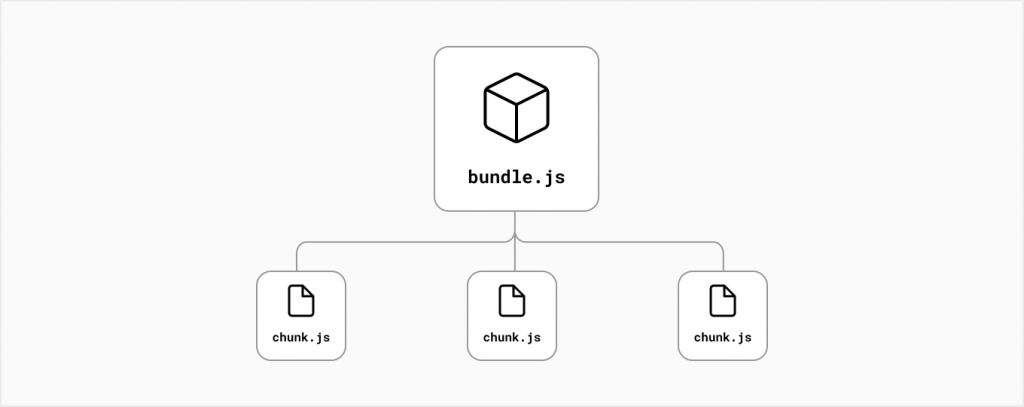
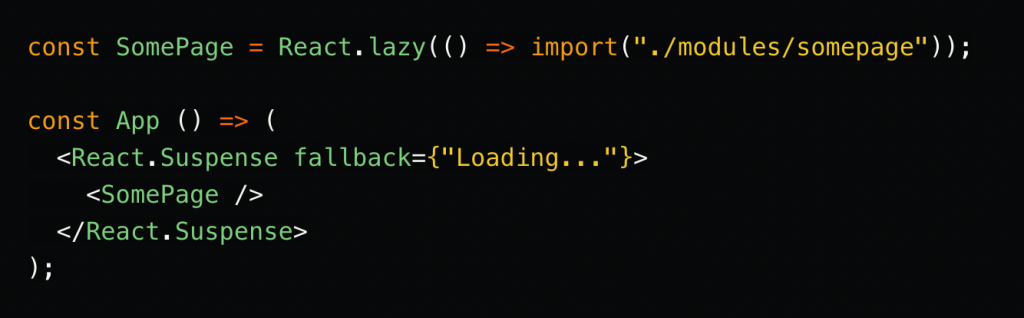
Code splitting, a technique to load only the necessary code for each page, has received a significant upgrade in Next.js 13 with automatic code splitting. This feature analyzes routes and dynamically splits code, ensuring that users are only presented with the code they need, resulting in faster initial load times.
Static Site Generation (SSG): Serving Speed And SEO
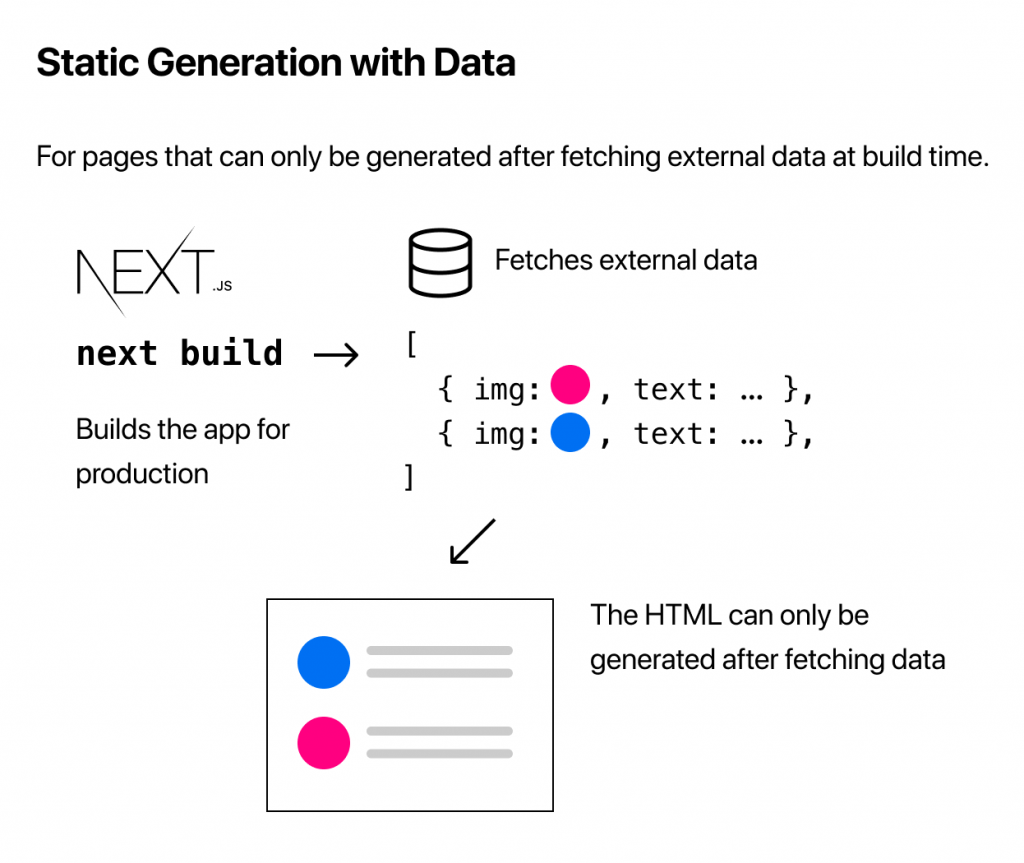
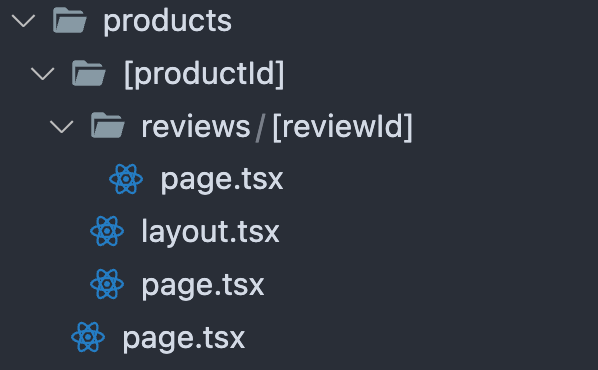
Next.js 13’s enhanced Static Site Generation (SSG) capabilities offer the ability to generate pre-rendered pages during build time. This leads to improved performance and search engine optimization (SEO), as users receive pre-rendered content, resulting in faster load times and better ranking potential.
Efficient Image Loading: Delivering High-Quality Visuals

Images are integral to web content, but they can also be performance bottlenecks. Next.js 13’s image optimization automates image formats and sizes based on user devices, ensuring fast loading without compromising quality.
Closing Thoughts

Next.js 13 isn’t just an update; it’s a glimpse into the future of performance-driven web development. With automatic prefetching, concurrent rendering, and adherence to best practices, developers can create web experiences that captivate users with speed, responsiveness, and visual excellence. As we journey towards a web world that demands seamless experiences, Next.js 13 stands as a testament to innovation and the boundless potential it holds.
By embracing Next.js 13’s performance enhancements and aligning with its best practices, developers can engineer websites that excel in both user experience and search engine rankings. In an era where milliseconds count, Next.js 13 empowers developers to navigate the fast-paced digital landscape with confidence.